Monday, May 16, 2011

From Concept to Creation

The creative process of your commissioned art pieces from New City Design.

When Cheryl K. of St. Louis, Missouri contacted New City Design about some design pointers in her historic shotgun style apartment, we had the opportunity to create a custom art piece for her Moroccan themed living room. The room featured some great architectural details and bold, lively colors. We wanted to add to that. Taking into consideration Cheryl's ideas and concepts, we were able to come up with three possible ideas, which were then presented to Cheryl.

Cheryl asked for more information about two of the three options, and New City Design presented her with sketches of each piece.

The first of these two pieces was the concept of a Moroccan inspired candle lit mirror, hand painted or etched with a Moroccan motif.


The second concept was a custom painting that was taken from actual Moroccan tile patterns.


Cheryl chose the paintings after discussing the two options with New City Design Consultant, Jessica Sanford. With a little feedback from Cheryl and some careful painting skills from New City Design, Cheryl now has a completely custom, one of a kind art piece for her beautiful living room.


Monday, April 25, 2011

Cute Things-- for a Cause!


These little cuties, designed by New City Design for sale by Sun Ministries, will be available at the Old North House Tour & Home Grown Festival in Old North St. Louis on May 14th! Stop by and see the other products available at their booth! All proceeds go to fund missionary work in North St. Louis through Sun Ministries!


Tuesday, April 5, 2011

Touches of Spring from New City Design

"Peace to All" Wreath created by New City Design

"My Little Friend" Mini Mantel Setting created by New City Design

Paper quilt design (2 of 3) created by New City Design


 Plus, Come back soon to see the before and after of these ruffles!


Interior Design Archive #1

Client: Angela H., O'Fallon, MO


The Foyer was furnished with a gorgeous cherry sofa table, a giant outdated silk floral arrangement and a grungy runner rug. Carrying the color scheme from the dining room, we were able to transform the room completely!


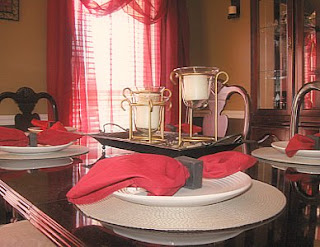
Before, this space was bare and colorless. The walls were one solid white color, with a ceiling to match. There was nothing on the windows, and the china cabinet was filled with outdated knicknacks.In the Dining Room, using existing furniture and thrifted finds, Angela and New City Design were able to create a warm, inviting environment just in time for a huge family get-together.


Previously, the Living Room had been a massive sea of white. White walls, white carpet, white furniture, white lampshades... Now, the family has a warm, comfortable and stylish place to entertain family and friends.

Tuesday, March 29, 2011

Moving Forward

New City Design is making progress!

As the beginning of the year comes to a close, New City Design is making plans to move forward into plans for an official business. We are currently being incubated by The Sun Ministries Opportunity Center, with high hopes of being independently established and located in the Hyde Park neighborhood of St. Louis, Missouri. The goal is to establish MWBE status within the next year, opening up all sorts of opportunities for business!

If you are interested in helping to further our progress, please let me know! You can help by hiring us for your interior design consultation, ordering a custom piece of home decor from us, or buying your next custom gift from us!

Stay tuned for more updates and goodies from New City Design!

Wednesday, March 9, 2011

Make your own leggings!

A while ago, I decides to try my hand at refashioning some clothing into things I would wear more often. My first project was to take a pair of flaired dress pants and make them into leggings. The pants I used were New York and Company black stretch. I picked these because they were a bit thicker than most leggings, and they would be warmer, whether I was wearing them as pants with a long shirt, or under a pair of jeans in place of thermals. They looked like this before I began:

(photo credit, Google)

The first thing I did was to lay the pant legs flat out on a table, pulling the outside seam taut and flat. It is okay if the inseam is a little bunched up. You will only be altering the outside seam.

Next, measure from outside of the knee of the pantleg about 3/4 inch. This is where the taper will start.

Mark 3/4 inch measurement with pin. Gradually taper/pin your measurements to form the pantleg. This might take some adjustments, so keep trying until you have a proper increase toward the hem. This requires a bit of precision. You might even want to measure your calf to determine the width of the finished pantleg. Be patient, or you will end up with a really funky pair of pants.

Next, cut along the outside of the pins. Make sure to cut the fabric and keep it in one piece. When you have trimmed the pantleg down, it will look like this:

Next, take the piece of fabric that you trimmed off of the first pantleg, and line it up along the taut, flat edge of the second pantleg.
Using the excess fabric as a template, pin and trim just as before.

When both sides are pinned, sew along the INSIDE of the row of pins, gradually tapering the pantleg.

Remove pins, trim down the seam to about 1/2 inch, and turn pants right side out. Viola! Refashioned leggings!

Tuesday, November 9, 2010

Aloha!

I am trying to start this thing up. It will for-sure be up within the next month, but I am finding it increasingly difficult to get it started without home internet. Hold tight, though! I will get it rolling, and hopefully have some recipes, photos of my very first interior design project, and maybe even a give-away within the next 2 months!